Medicinal Herbs

31 Natural Herbs That Effectively Treat Inflammation
Medicinal Herbs, Supplement, Weight loss

31 Natural Herbs That Effectively Treat Inflammation

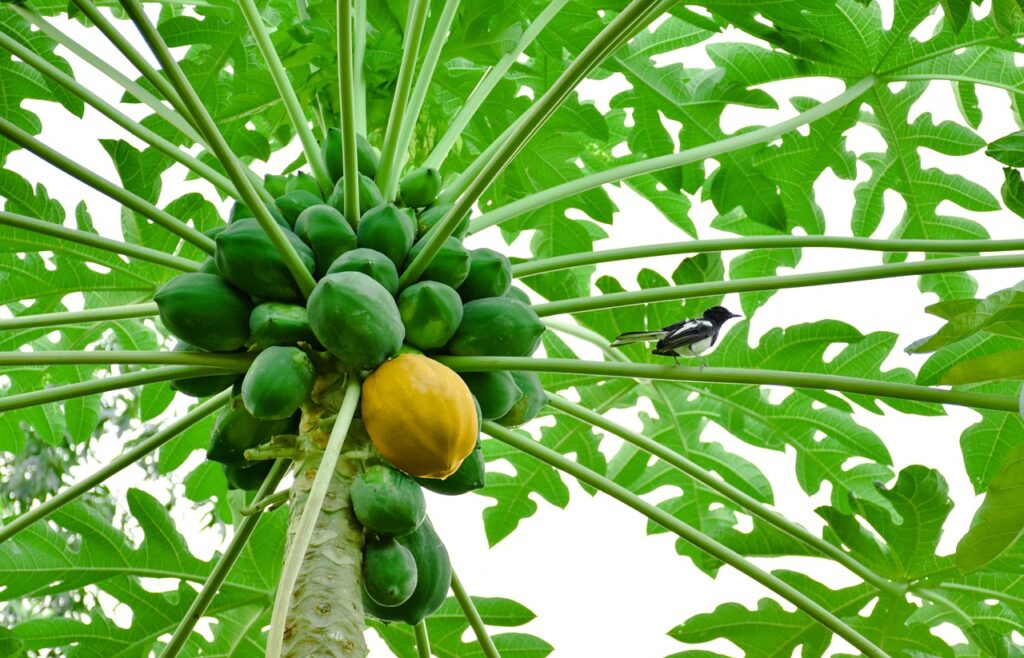
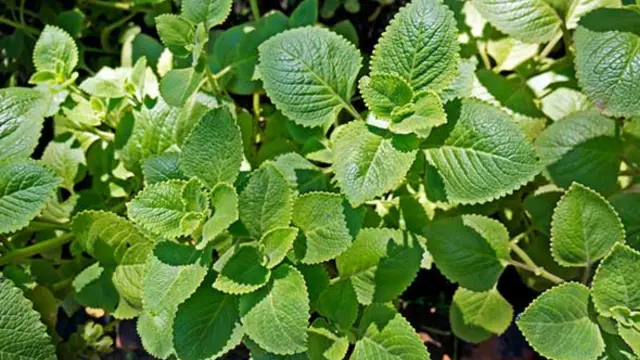
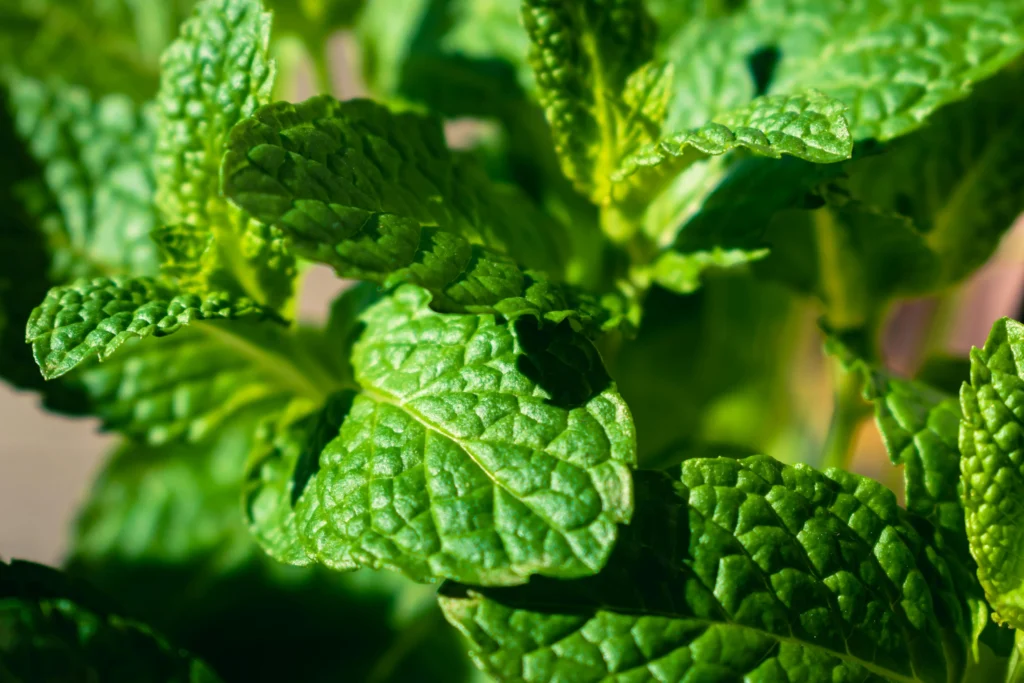
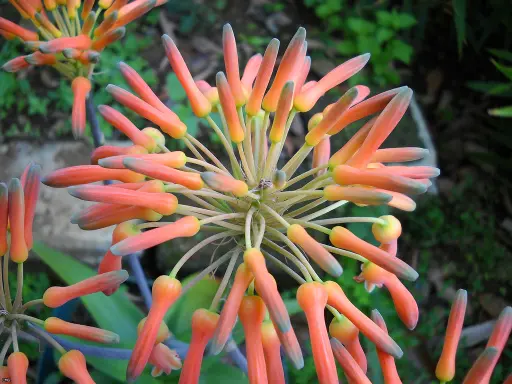
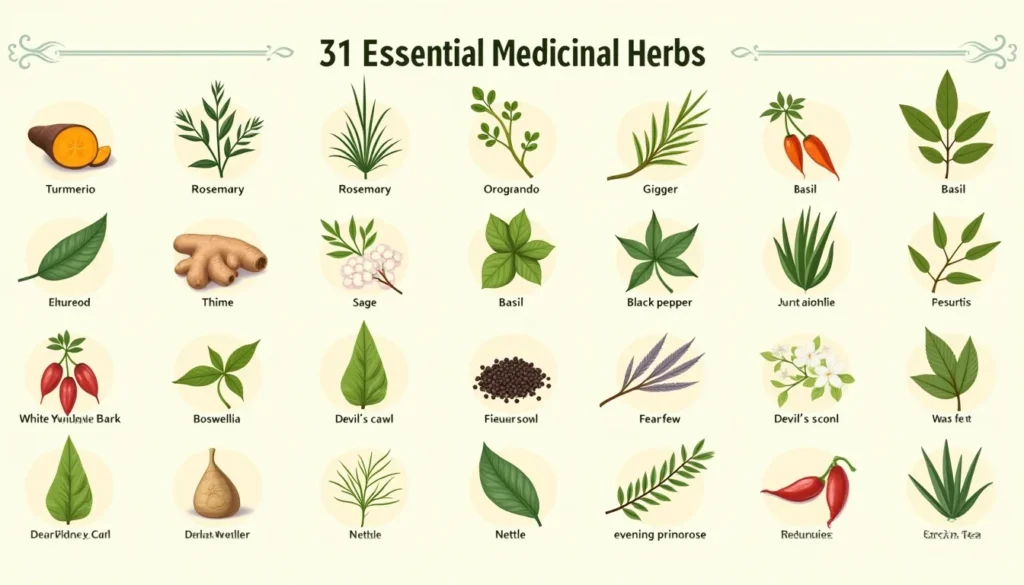
31 Natural Herbs That Effectively Treat Inflammation Understanding what is inflammation Ever wondered why your body gets all hot and bothered sometimes? That’s inflammation doing its thing!  Inflammation It’s like your body’s personal security system, always on guard to protect you from harm.  In this blog we’ll learn about 31 Natural Herbs That Effectively Treat Inflammation. Inflammation isn’t just about those red, swollen spots you can see. It’s your body’s complex response to harmful stimuli, working kinda like your personal security system. But here’s the thing: when this security system goes haywire, it can lead to all sorts of issues.  Think of it as having an over enthusiastic security guard who tackles every visitor, even the friendly ones! Did you know that over 50% of Americans are living with chronic inflammation? Recent research from the National Institute of Health shows that chronic inflammation plagues the joints, intestines, and even the brain “Inflammation is the body’s natural response to protect itself against harm. However, chronic inflammation is now recognized as a major factor in many modern diseases. Dr. Andrew Weil, M.D. Medical Doctor, author List of 31 Natural Herbs That Effectively Treat Inflammation Lorem ipsum dolor sit amet, consectetur adipiscing elit. Ut elit tellus, luctus nec ullamcorper mattis, pulvinar dapibus leo. Lorem ipsum dolor sit amet, consectetur adipiscing elit. Ut elit tellus, luctus nec ullamcorper mattis, pulvinar dapibus leo. Types of Inflammation Let’s break down the two main types: 1. Acute Inflammation Duration: Short-term (days to weeks) Causes: Injuries, infections Signs: Redness, swelling, heat, pain Purpose: Healing and protection 2. Chronic Inflammation Duration: Long-term (months to years) Causes: Autoimmune conditions, lifestyle factors Signs: Fatigue, persistent pain, digestive issues Impact: Can lead to serious health conditions Common Signs You May Have Chronic Inflammation Watch for these warning signs: Persistent joint pain or stiffness Digestive problems (bloating, gas, discomfort) Frequent infections Constant fatigue despite adequate sleep Skin issues (rashes, acne, eczema) Brain fog and difficulty concentrating Unexplained weight gain Poor sleep quality How Herbs Combat Inflammation Nature’s medicine cabinet offers powerful tools for fighting inflammation. These herbs work through multiple mechanisms that scientists are just beginning to fully understand. The beautiful thing about herbal medicine is that plants contain hundreds of compounds working synergistically, rather than just one isolated chemical. Primary Mechanisms of Action COX-2 Enzyme Inhibition. Many anti-inflammatory herbs inhibit COX-2 which is the enzyme that releases the inflammatory prostaglandins. This is how ibuprofen works but to a milder extent without side effects. Antioxidant Activity. Oxidative stress is what free radicals cause in the body which induces inflammation. Therefore, herbs with antioxidants prevent these hazardous molecules from causing cellular damage in the first place. Cytokine Influence. Cytokines are messenger proteins that signal an inflammatory response. Some herbs have the ability to signal their presence to reduce excessive inflammation but maintain functioning immune response where appropriate. NF-κB Pathway Influence. This transcription factor is responsible for the genes that manage inflammation response. Many of the most potent anti-inflammatory herbs impact this pathway and its transcription factor signaling. Why Choose Herbs Over Conventional Medications? Benefits of Herbal Approaches: Fewer side effects with long-term use Multi-targeted action (address multiple pathways) Support overall health beyond inflammation Lower risk of organ damage Cost-effective options available Can be combined with lifestyle changes Important Note: This doesn’t mean herbs are always better or should replace necessary medications. Work with healthcare providers to determine the best approach for your situation. Top 31 Anti-Inflammatory Herbs Now let’s dive deep into the herbs that can transform your relationship with inflammation! Starting with: 1. Turmeric (Curcuma longa) The golden champion of anti-inflammatory herbs! Curcumin, the active ingredient in turmeric, is a powerful anti-inflammatory substance that’s been heavily researched. Over 12,000 published scientific papers discuss curcumin’s health benefits. Key benefits are: Reduces joint pain and stiffness Improves digestive health Supports brain function and memory Enhances immune response Protects heart health Scientific Evidence: A 2012 study from Phytotherapy Research showed curcumin to be as effective as diclofenac (an NSAID used commonly) for rheumatoid arthritis symptoms without gastrointestinal side effects. How to Use Turmeric: Golden Milk: Mix 1 tsp turmeric powder with warm milk, pinch of black pepper, honey Supplements: 500-2000mg daily of standardized extract (95% curcuminoids) Fresh Root: 1-3 grams daily, grated into smoothies or cooking With Black Pepper: Always combine with piperine (black pepper) to increase absorption by 2000% Precautions: May increase bleeding risk (avoid before surgery) Can interact with blood thinners High doses may cause digestive upset May lower blood sugar levels 2. Ginger (Zingiber officinale) Ginger is a miracle spice! The active components, gingerols and shogaols, exert their anti-inflammatory properties by interrupting the inflammatory pathway at virtually every level of effectiveness. Active Compounds: 6-gingerol (most abundant) 6-shogaol (formed during drying/cooking) Zingerone Paradols Research Note: A 2019 study of 247 people showed that in a 12 week period, ginger increased osteoarthritis pain markers by 30% (with reported increases in range of motion and less use of pain medication). Active Compounds: 6-gingerol (most abundant) 6-shogaol (formed during drying/cooking) Zingerone Paradols Research Note: A 2019 study of 247 people showed that in a 12 week period, ginger increased osteoarthritis pain markers by 30% (with reported increases in range of motion and less use of pain medication). Best Uses: Nausea and digestive inflammation Muscle soreness after exercise Arthritis pain Menstrual cramps Migraine relief How to Consume: 1. How to make Ginger Tea: Fresh Ginger Tea:– 1 inch fresh ginger, sliced– 2 cups boiling water– Steep 10-15 minutes– Add lemon and honey to taste– Drink 2-3 times daily Ginger Shot:– 2 inches fresh ginger– 1 lemon, juiced– Pinch cayenne– 1 tsp honey– Blend and strain Supplement Dosage: General use: 250-500mg daily Acute inflammation: 1000mg divided doses Motion sickness: 500mg 30 minutes before travel 3. Holy Basil (Tulsi) More than a mere pasta herb, holy basil (Ocimum sanctum) is known as the “Queen of Herbs” in Ayurvedic medicine, meaning it’s better than a little bit good for you. Holy basil is filled with eugenol, rosmarinic acid and more,

12 Benefits of dried prunes
Home Remedies, Medicinal Herbs, Weight loss

12 Benefits of dried prunes

12 Benefits of dried prunes Prunes are probably the most underappreciated of the dried fruits that people do not pay much heed to, among their favorite dates or dried cranberries. Yet these wrinkly delights are packed with impressive nutrition. They, too, must have their moment in the sun. A good candidate for prunes should have a high sugar content andconverts well to the drying process. Though all dried plums are technically prunes, not all plum varieties make good prunes. Health benefits 1: Digestive Health and Regularity2: Bone Strength and Osteoporosis Prevention3: Heart Health Support4: Blood Sugar Control5: Weight Management Support6: Antioxidant Protection7: Vision Support8: Anemia Prevention9: Immune System Enhancement10: Anti-Inflammatory Properties11: Skin Health Promotion12: Culinary Versatility Introduction Prunes have been dehydrated for ages and praised for their sweet multi flavor, and incredible health benefits are on top even in modern times. A lot of time, they find themselves at the back of the pantry or are typecast as some kind of digestive solution; surely, they have more potential in our diets. Dried prunes are in fact nothing more than dried plums. This humble offering carries an incredible load of nutrition that pretty much supports every system in the human body. In a society that tends to follow and quickly forget health fads and superfoods, dried prunes have persistently proven scientifically based benefits and are nutritional dynamite. They help with bone development and strengthen the skeleton, boost digestion, and may also lower the chances of getting conditions related to chronic diseases What Are Dried Prunes? Dried prunes are the dehydrated form of European plums (Prunus domestica), specifically cultivated varieties that lend themselves well to drying. Though all dried plums are technically prunes, not all plum varieties make good prunes. The most common variety used for commercial prune production is the La Petite d’Agen, originally from France but now predominantly grown in California’s Central Valley, which produces over 40% of the world’s dried prunes. The transformation from plum to prune involves a careful dehydration process that concentrates the fruit’s sugars and nutrients while preserving its beneficial compounds. Historically, prunes were sun-dried, but modern commercial production typically uses dehydrators with controlled temperature and humidity to ensure consistent quality and food safety. Benefits of dried prunes Benefit # 1: Digestive Health and Regularity One of the most notable benefits of dried prunes is its impact on digestive health. They’re a natural laxative that keeps people going to the bathroom regularly and prevents constipation, a digestive issue that plagues young and older populations alike  and it’s a well known and scientifically supported . Research has demonstrated that dried prunes possess a unique cocktail of dietary properties that work hand in hand to promote a healthy digestive system. In no small part, dried prunes are an excellent source of soluble and insoluble fiber, with 3 grams in every 40 gram serving. Adding fiber to your diet adds volume to stool, helping it soft to maneuver through the intestines and digestive system. In addition, insoluble fiber helps to slow down transit time through the intestines while soluble fiber creates a gel like substance that softens stool to make it easier to pass. In addition to fiber, natural, scientific properties exist, such as sorbitol and phenolic compounds that act like a laxative when it comes to dried prunes. Sorbitol is a sugar alcohol compound not fully absorbed by the body and thus draws water through the intestines, further softening stool while phenolic compounds stimulate contractions of the intestinal system to better move contents through the digestive system. For example, A 2011 study published in Alimentary Pharmacology and Therapeutics demonstrated that they are superior to psyllium (an often used fiber additive) for people who want effective treatment of mild to moderate constipation. Compared to psyllium, dried prunes increased stool frequency and improved consistency over time for subjects where psyllium did not cause any frequency changes throughout the experimental period. Even beyond constipation relief, other digestive benefits exist thanks to their prebiotic properties, serving as food for essential bacteria, meaning that the microbiome regulated within intestines may benefit from dried prunes, as well. Essentially, this microbiome has become an increasingly important part of digestive health and promotes immune function and mood regulation. “Dried plums (prunes) are safe, palatable and more effective than psyllium for the treatment of mild to moderate constipation, and should be considered as a first-line therapy.” Dr. Satish Rao, study author and gastroenterologist Benefit #2: Bone Strength and Osteoporosis Prevention One of the most fascinating and scientifically proven benefits of dried prunes is for bone health. Studies have repeatedly shown that eating dried prunes regularly can help prevent bone loss and maintain bone density, even restore bone mass in those with osteopenia or osteoporosis. About 10 million people in America suffer from osteoporosis. In women, post menopausal osteoporosis can occur due to decreased estrogen levels and predisposition to certain cancers. Osteoporosis involves porous bones that increase fracture risk, impacting aging adult populations and their quality of life and independent status. Therefore, the fact that dried prunes possess bone protective properties are welcome considerations in such a common health concern. Scientists aren’t 100% sure how dried prunes exert bone benefits, but it’s been theorized to be from the unique nutrient composition they epossess. They contain several nutrients essential for bone health, including: Vitamin K: Critical for bone mineralization and the activation of osteocalcin, a protein that binds calcium to bone Boron: A trace mineral that helps prevent calcium loss and supports the metabolism of vitamins and minerals involved in bone formation Copper: Required for collagen production and cross-linking, important for bone structure Potassium: Helps neutralize acid load, which can otherwise lead to calcium leaching from bones Phenolic compounds: May reduce bone resorption (breakdown) by inhibiting osteoclast activity. In a study in the British Journal of Nutrition, researchers assessed dried plum impact on postmenopausal women over one year and followed up with a second year study to assess longer term benefits. It was found that participants eating approximately

How to grow soursop tree
Medicinal Herbs

How to grow soursop tree

How to Grow a Soursop Tree ” The Complete Guide” While going up in Jamaica as a child, going to the country (rural area) was a joy, just to enjoy the abundance of ripened fruits; one such fruit is the soursop. These trees can be found in nearly all the yards. But in the city you can hardly find these trees. Now in the city, you can now find soursop trees growing in most yards, all because of the real health benefits. In this blog you’ learn how to grow soursop  trees. Have you ever wondered what it would be like to walk into your backyard and pluck a fresh, creamy soursop fruit straight from your own tree? Picture this: a spiky, heart-shaped fruit that’s packed with vitamin C, antioxidants, and a flavor that’s been described as a tropical cocktail of strawberry, pineapple, and banana. Sounds like a dream, right? Well, what if I told you that growing your own soursop tree isn’t just possible, it’s surprisingly achievable with the right knowledge and care? Soursop fruit is loaded with vitamin C, which is known for supporting and boosting your immune system, and is also high in antioxidants, substances that protect cells from damage. In traditional medicine, soursop leaves, bark, and roots have been used to treat a variety of ailments, with soursop tea often consumed to help lower blood pressure, reduce fever, and alleviate symptoms of respiratory conditions. Whether you’re a seasoned gardener looking to expand your tropical fruit collection or a beginner drawn to the idea of growing your own superfood, this comprehensive guide will walk you through every step of cultivating a thriving soursop tree. We’ll cover everything from selecting the perfect location to harvesting those coveted fruits, addressing common challenges along the way. Key takeaways Before we get started, here are the five most crucial points to remember on your soursop growing journey: Location and Climate Are Non-Negotiable: Full sun (6-8 hours daily), warm temperatures (77-90°F), and frost protection are essential for tropical soursop trees. Drainage is Your Tree’s Lifeline: Poor drainage kills more soursop trees than any other factor. Ensure well-draining soil with pH 5.5-7.0 and use raised beds if needed. Patience Pays Off with Proper Care: Grafted trees fruit in 2-3 years, seed-grown in 3-4 years. Consistent watering, fertilization, and pest protection during establishment determine success. Fertilization Timing Matters: Young trees need balanced nutrition (10-10-10), while mature trees require high-potassium fertilizers (15-5-35+Mg). Avoid over-fertilizing with nitrogen. Prevention Beats Treatment: Regular monitoring, proper pruning, clean growing conditions, hand pollination, and fruit bagging prevent most problems and increase yields. Understanding the Soursop Tree: Your Gateway to Tropical Paradise The soursop tree (Annona muricata) is like the hidden gem of the tropical fruit world. Native to the Caribbean and Central America, this evergreen beauty can grow up to 30 feet tall and produces some of the most nutritionally dense fruits you’ll ever encounter. This plant is widely grown in tropical regions and is widely used as a traditional medicine for skin disease, respiratory disease, fever, bacterial infections, diabetes, hypertension, and cancer. But here’s what makes soursop special: it’s not just about the fruit. The entire tree is a treasure trove of benefits. The leaves can be brewed into tea, the bark has medicinal properties, and the fruit itself is a nutritional powerhouse that’s low in calories but high in fiber, vitamin C, and essential minerals. Think of your soursop tree as an investment in your health and culinary adventures. Unlike many tropical fruits that require years of patience, soursop trees can begin producing fruit within just 2-3 years when grown from grafted seedlings, or 3-4 years when grown from seed. Lorem ipsum dolor sit amet, consectetur adipiscing elit. Ut elit tellus, luctus nec ullamcorper mattis, pulvinar dapibus leo. Now here’s the step-by-step guide to growing soursop trees: as follows below Step 1: Choosing the Perfect Location for Your Soursop Tree. Step 2: Soil Preparation – Building the Foundation for Success Step 3: Propagation and Planting – Getting Your Tree Started Right Step 4: Watering—The Art of Hydration Balance Step 5: Fertilization – Feeding Your Tree for Optimal Growth Step 6: Pruning and Maintenance – Shaping Your Tree for Success Step 7: Flowering and Pollination – Maximizing Fruit Set Step 8: Pest and Disease Management – Protecting Your Investment Step 9: Harvesting – Reaping the Rewards of Your Labor Step 10: Post-Harvest Storage and Usage Now let us start to grow soursup tree Step 1: Choosing the Perfect Location for Your Soursop Tree Location is everything when it comes to soursop cultivation. These trees are particular about their environment, but once you understand their needs, you’ll be setting yourself up for success. Climate Requirements: Creating Your Tropical Microclimate Soursop trees thrive in warm, humid tropical climates, specifically USDA zones 10-12. The ideal temperature range is between 77-90°F (25-32°C). Here’s the crucial part: these trees absolutely cannot tolerate frost. Even a light frost can damage or kill young trees, so if you’re in a borderline climate, consider growing your tree in a large container that can be moved indoors during cold snaps. If you live in a cooler climate, don’t despair. Many successful growers have created greenhouse environments or use south-facing walls that create heat pockets. The key is consistency; soursop trees prefer stable temperatures without dramatic fluctuations. Sunlight: The Foundation of Fruit Production Your soursop tree needs full sun exposure a minimum of 6-8 hours of direct sunlight daily. This isn’t negotiable if you want fruit production. Think of sunlight as the engine that powers photosynthesis, which directly impacts flower and fruit development. Position your tree where it will receive morning sun, which helps dry dew from the leaves and reduces fungal issues. If you’re dealing with extremely hot climates (above 95°F regularly), some afternoon shade can actually be beneficial to prevent heat stress. Wind Protection: Safeguarding Your Investment Soursop trees have large, soft leaves and relatively shallow root systems, making them vulnerable to strong winds. Temperature sensitivity

soursop fruit tree
Home Remedies, Medicinal Herbs

Soursop fruit tree

soursop fruit tree Soursop, also known as graviola, guyabano, or guanábana, is a tropical fruit tree native to the warm rainforests of Central and South America. While the fruit itself is prized for its unique flavor and creamy texture, the large, green leaves of the soursop tree have been used for centuries in traditional medicine practices. Soursop Appearance and Characteristics The soursop tree can grow up to 9 meters (30 feet) tall, with a dense canopy of glossy, oblong leaves that measure around 10-25 cm (4-10 inches) in length. The leaves have a distinct, slightly pungent aroma and are covered in a fine, velvety fuzz. When crushed or brewed, the leaves release a rich, earthy scent. Key takeaways Climate: Sour sop trees thrive in warm, tropical/subtropical climates (USDA zones 10-11) with temperatures between 77-95°F (25-35°C). They cannot tolerate frost or freezing. Soil: Well-draining, fertile soil with a slightly acidic to neutral pH (6.0-7.5) is ideal. Provide regular deep watering, allowing soil to partially dry between waterings. Sunlight and Spacing: Full sun exposure is essential. Allow at least 25-30 feet (7.6-9.1 meters) between trees as they can grow quite large. Patience and Harvesting: Trees typically take 3-5 years to produce fruit, but leaves can be harvested sooner once established. Harvest leaves carefully to avoid excessive pruning. Botanical Name and Family The botanical name for sour sop is Annona muricata, and it belongs to the Annonaceae family, which includes other tropical fruit trees like cherimoya and custard apple. Growing a Soursop Tree If you live in a warm, tropical or subtropical climate, you may be able to grow your own soursop tree and harvest the leaves yourself. Here are some tips: Soursop trees thrive in USDA hardiness zones 10-11, with temperatures between 25-35°C (77-95°F). They require well-draining soil, full sun exposure, and consistent watering. Soursop trees thrive in USDA hardiness zones 10-11, with temperatures between 25-35°C (77-95°F). They require well-draining soil, full sun exposure, and consistent watering. Trees can take 3-5 years to produce fruit, but leaves can be harvested sooner. Harvest leaves carefully, avoiding damage to the tree. Here are some tips for growing a soursop tree (Annona muricata) at home: Climate and Growing Conditions: Soursop trees thrive in warm, tropical and subtropical climates. They grow best in USDA hardiness zones 10-11, with temperatures ranging from 25-35°C (77-95°F). They require full sun exposure and cannot tolerate frost or freezing temperatures. Soil Requirements: Soursop trees prefer well-draining, fertile soil with a slightly acidic to neutral pH range of 6.0-7.5. They can tolerate sandy or clay loam soils but do not grow well in heavy, waterlogged conditions. Planting and Spacing: Soursop trees can be grown from seeds or grafted saplings. When planting, choose a spot with full sun exposure and plenty of room for the tree to grow, as they can reach heights of 25-30 feet (7.6-9.1 meters) and a similar spread. Space trees at least 25-30 feet (7.6-9.1 meters) apart. Water and Fertilizer Needs: Soursop trees require regular watering, especially when first establishing. Water deeply and allow the soil to partially dry out between waterings. Applying a balanced, slow-release fertilizer every 2-3 months during the growing season can help promote healthy growth. Pruning and Maintenance: Prune soursop trees annually to remove dead, damaged, or overcrowded branches, and to shape the tree. Pruning should be done in late winter or early spring before new growth emerges. Fruit and Leaf Production: Soursop trees typically take 3-5 years to begin producing fruit. However, leaves can be harvested sooner, once the tree is established. Harvest leaves carefully, avoiding excessive pruning or damage to the tree. Pests and Diseases: Monitor for common pests like fruit flies, mealybugs, and scale insects. Diseases like anthracnose and root rot can also affect soursop trees. Proper cultural practices and organic pest management can help prevent and control issues. Harvesting and Storage: Soursop fruit is typically harvested when it falls from the tree, indicating ripeness. Fresh leaves can be harvested as needed, but be sure to leave enough foliage for the tree’s health. Dried leaves can be stored in an airtight container for future use. With the right climate, soil conditions, and care, growing a soursop tree at home can provide a source of fresh fruit and leaves for culinary or medicinal purposes. However, it’s essential to research and follow best practices for sustainable cultivation and responsible harvesting. Summary Table: Key Soursop Growing Requirements By following these guidelines, you can successfully grow and care for a soursop tree in suitable tropical or subtropical climates Scientific Research on Soursop Leaves In recent years, there has been growing scientific interest in studying the potential benefits and mechanisms of action of soursop leaves. Here’s a look at some of the key areas of research: Anti-Cancer Potential: Several studies have investigated the anti-cancer properties of compounds found in soursop leaves, particularly acetogenins like annonacin, goniothalenin, and goniotalenin. These compounds have shown promising results in inhibiting the growth and proliferation of various cancer cell lines, including breast, lung, and colon cancer cells. However, it’s important to note that most of these studies have been conducted in vitro (in test tubes or petri dishes) or on animal models. More clinical research is needed to determine the potential anti-cancer effects and safety of soursop leaf compounds in humans. Anti-Inflammatory Mechanisms: Researchers have explored the anti-inflammatory potential of soursop leaves, with some studies suggesting that compounds like annonacin and annocatacin may help suppress inflammatory pathways and reduce the production of pro-inflammatory cytokines. This anti-inflammatory activity could have implications for the treatment of various inflammatory conditions, such as arthritis, asthma, and autoimmune disorders. However, more research is needed to fully understand the mechanisms and potential therapeutic applications. Antimicrobial and Antiviral Properties: Some studies have investigated the antimicrobial and antiviral properties of soursop leaf extracts. Preliminary research has suggested that these extracts may exhibit activity against certain bacteria, fungi, and viruses, potentially due to the presence of compounds like acetogenins and alkaloids. While promising, more rigorous clinical studies are necessary to confirm the efficacy and safety of using soursop leaves as an antimicrobial

Castor Bean Plant Seeds
Home Remedies, Medicinal Herbs

Castor Bean Plant Seeds: A Complete Guide

Castor Bean Plant Seeds: A Complete Guide Castor bean plants (Ricinus communis) produce seeds that are an important crop grown for castor oil production. However, the seeds also contain a dangerous toxin called ricin, so safety precautions are critical when handling these seeds. This guide offers an extensive overview of castor bean plant seeds including details on growing conditions, harvesting methods, seed uses, and necessary handling precautions when utilizing this unique seed crop. Key takeaways: Castor bean seeds contain the toxic ricin compound, necessitating extreme safety precautions like protective gear and decontamination when handling. Once detoxified, castor seeds provide valuable castor oil for industries and organic fertilizers from the nutrient-rich seed meal. Optimal castor seed cultivation requires warm climates, fertile well-drained soils, and proper planting/harvesting techniques. Safe long-term seed storage involves drying to 10% moisture, airtight containers, and cool/dry conditions to preserve viability and oil quality. Get the latest news and tips from the posts straight to your inbox Join the 10000+ subscribers for exclusive access to our  monthly health newsletter on natural healing Subscribe now Introduction to Castor Bean Plants Castor bean plants likely originated in tropical Africa based on fossil evidence, but the exact region is unclear. Historical records indicate early cultivation in Egypt and the Mediterranean region dating back to biblical times. Today castor grows well globally in tropical and subtropical climates. Botanically classified as Ricinus communis, the castor bean is not a true bean at all. It is a seed from the spurge family of flowering plants (Euphorbiaceae). Other key details regarding castor bean plants: Plant type: fast-growing, annual flowering plant Height: Can reach 15 – 18 feet tall at maturity Flowers & seeds: Produced on stems in spiny green seed pods containing up to 10 seeds each Seed oil uses: Castor oil has a number of industrial applications Toxicity: Seeds contain ricin, an extremely poisonous compound Next we will explore details on the seeds themselves that make castor bean plants so unique. Castor Bean Plant Seeds Physical Characteristics Castor seeds are unlike any other crop seed given their distinct physical features and chemical composition: Size & Shape Size range: 1/8 to 1/4 inches long Shape: Ovoid shaped with a pointed tip Outer Coating Glossy exterior casing Color variations Reddish-brown Black White Gray Multicolored mixes Inner Composition Seed contents: 42–55% oil 35% water 10% protein 4% carbohydrates 5% fiber 1% ash Toxins: Ricin and related cytotoxins The oil content makes castor seeds extremely valuable, but the ricin toxin also makes the seeds dangerous if improperly handled.  Proper growing conditions are essential to optimize castor bean seed production while maintaining personal safety. Ideal Growing Conditions Castor grows well in light, fertile soil types in tropical or subtropical climates with consistent warmth. Key growing requirements include:  Climate Conditions Warm weather Minimum temp > 10°C Optimum temp 21–27°C Annual rainfall Minimum of 30–100 cm Optimum of 75–100 cm Grows optimally up to 1200 meters altitude Soil Requirements Light, well-drained, fertile soils Soil pH between 5.5 and 7.0 Full sun exposure Plant Spacing Space rows 90–150 cm apart Space plants 30–90 cm apart within rows With adequate warmth and soil moisture castor establishes quickly. Taproots extend deeply to better access soil moisture in drier conditions. Next we’ll review the planting process and seed germination specifics. Planting & Germination Castor establishes best by direct seeding into warm soil. Here are key planting and germination guidelines: Planting Time After frost risk has passed When soil temperature exceeds 17°C Planting Process Till soil to depth of 15-20 cm Dig furrows at desired row spacing Place 2-3 seeds every 30 cm within the furrows at 1-2 cm depth Cover seeds lightly with soil Pack down covering soil Germination Process Seeds swell upon absorbing water Radical emerges approximately 5 days after planting Emergence: 10-15 days Optimal soil temperature for emergence: 20-30°C Seedlings grow rapidly given adequate warmth, soil moisture Thin seedlings to one plant every 30 cm once established. As plants transition into maturity, monitor them for signs they are ready for harvest. Harvesting Castor Bean Seeds Castor seeds ripen at different rates even within the same plant. Plants typically reach maturity and produce seed pods within 3-4 months after planting. Monitor seed pods closely as they near maturity. Harvest indicators: Seed pods turn yellowish and dry out Seeds rattle inside the dried pods when shaken Seed coats transition to mature color (species dependent) Harvesting Process Carefully cut seed heads from plants by hand one at a time Place heads into collection bags Transport bags carefully to prevent spilling Store picked heads out of moisture until threshing Thresh pods by hand or with mechanical threshers. Wear appropriate protective garments while handling seeds including gloves, long sleeves, face masks and eye protection. Castor seeds store safely within cool, sealed containers for up to 5 years without significant deterioration. However, seed oil content slowly declines over extended storage periods. Get the latest news and tips from the posts straight to your inbox Join the 10000+ subscribers for exclusive access to our  monthly health newsletter on natural healing Subscribe now Post Harvest Handling & Storage Due to toxicity precautions, carefully handle and store harvested castor seeds using these protocols: Drying Seeds Dry seeds to safe storage moisture of 10% Spread seeds in thin layers Use drying fans at 43°C for up to six days Monitor moisture content Storage Containers Seal seeds in moisture-proof containers Glass, tin or heavily lined bags Storage Conditions Cool, dry room Ambient temperatures from 0°C to 25°C Relative humidity of 50-70% By following these post harvest protocols, castor bean seeds store well for extended durations. This allows time for demand to potentially increase for castor seed oil extraction or other usages we’ll explore next. Castor Seed Uses & Production Castor seeds serve various applications once harvested and properly processed to prevent toxicity: Castor Oil Extraction The oil rich seeds produce an extremely versatile oil used across industries: Oil Extraction Process Carefully crack seeds Heat to allow oil to flow Press seeds to extract oil Decant and filter oil Carefully detoxify oil

man sitting on a toilet seat in pain holding a glass of prune juice 1
Home Remedies, Medicinal Herbs

Prune Juice to Relieve Constipation

Prune Juice to Relieve Constipation Constipation can be a troublesome condition, making bowel movements difficult and infrequent. Over 30% of adults suffer from occasional constipation. While increasing fiber, fluid intake, exercise and other lifestyle measures should be the first line approach, turning to prune juice can provide added relief. What is Constipation? Constipation refers to infrequent, difficult, or incomplete bowel movements. Symptoms may include: Passing fewer than 3 stools per week Having lumpy or hard stools Straining to have bowel movements Feeling unable to completely empty the rectum Needing to manually evacuate stools Constipation has many possible underlying causes, including: Inadequate fluid intake or dehydration Lack of fiber Alterations in hormones Slowed colonic transit time Certain medications like painkillers or antidepressants Various medical conditions While occasional constipation is very common, chronic or persistent constipation should be evaluated by a doctor to identify any underlying disorders. The key facts about prune juice  include:Rich in sorbitol – a natural sugar alcohol with laxative effects High fluid content helps hydrate the body Source of nutrients like vitamin A, potassium, magnesium ** Pleasant, mild flavor** makes it relatively palatable Key Takeaways: Using Prune Juice for Constipation As a natural source of sorbitol, fluids and nutrients, prune juice can provide safe, effective relief from occasional constipation Start with 4-8 ounces diluted with water on an empty stomach and allow 12-48 hours to take effect Dosage can be adjusted up based on degree of constipation, maximum is 16oz daily While useful for adults, prune juice is not recommended for children under age 6 Pregnant women should exercise caution and get medical guidance before using as a remedy Focus on lifestyle measures like fiber, hydration and activity as well to prevent constipation Used judiciously alongside a high fiber diet, hydrating fluids, exercise and other positive bowel habits, prune juice is generally a safe, affordable and time-tested natural home remedy to get constipation relief gently and rapidly. What is Prune Juice? Prune juice is a natural home remedy used to help relieve mild cases of constipation. It is made by steeping dried plums, aka prunes, in water to extract their juices and nutrients.  The sorbitol in prune juice works by drawing water into the large intestine, helping to soften and pass stool. The additional fluids also add hydration, while nutrients like potassium support proper muscle function. Prune Juice Calculator Age (years): Weight (kg): Activity Level: SedentaryLightly ActiveModerately ActiveVery ActiveExtremely Active Digestive Health: SensitiveNormalNeeds Support Calculate Recommended Intake Recommended Daily Prune Juice Intake 0 ml per day FAQ: Is taking prune juice daily bad or unhealthy? Using small servings of prune juice as an occasional constipation remedy is generally fine and healthy. However, regularly consuming very high amounts long-term may result in an electrolyte imbalance or nutrient deficiencies over time. Always start with the lowest effective dose based on your individual response. Prune Juice Dosage Guidelines by Age When administering prune juice to children, consider the child’s age and consult with a pediatrician, especially for infants under one year old. Here are general prune juice dosage guidelines based on age: Note: Individual responses may vary. Always start with the lowest effective dose and adjust based on your body’s response. Consult with a healthcare provider before beginning any constipation treatment regimen, especially for children, pregnant women, and those with existing medical conditions. Are Prune Juices Right for Children? Most doctors recommend not using prune juice as a remedy for constipation in children under 6 years old. The laxative effect can be unpredictable and too strong for a young child’s body. For babies and toddlers, seek medical advice before treating constipation with prune juice. In older children over 6 who are impacted or struggling to pass painfully hard stools, a pediatrician may suggest 2-4 ounces of diluted prune juice under careful supervision. However, never give more than 4 oz. of diluted juice (1:1 ratio prune juice:water) without first consulting your pediatrician. Quote: “Prune juice works safely for some children, but dose must be carefully determined based on the child’s age, size, and degree of constipation. Always check with your pediatrician before using prunes or prune juice.” – Dr. Anita Patel, Pediatric Gastroenterologist Focus first on providing plenty of fluids, fiber-rich foods, exercise and toilet sitting schedules rather than laxatives which can backfire. Speak to your doctor before giving any child prune juice without medical oversight Is Prune Juice Safe During Pregnancy? Mild constipation and hemorrhoids are extremely common complaints during the second and third trimesters as the uterus compresses on the bowel. This leads many pregnant mothers to ask – can I drink prune juice while pregnant? n healthy pregnant women without complications, most doctors agree prune juice is generally considered safe to drink in moderation to ease constipation and prevent excessive pushing and straining. The key precautions include: Starting with just 2-4 ounces diluted with water Only drinking occasionally, not exceeding 8 ounces daily Stopping immediately if cramping or diarrhea occur Staying well hydrated to balance the effects Of course, get personalized medical advice before taking prune juice while pregnant if you have any digestive issues like IBS or pregnancy complications. Additionally, be cautious with excessive or long-term use to prevent dependence on laxatives or safety issues. But when used carefully, pregnant women can usually find relief with the natural benefits of prune juice. Additional Constipation Relief Tips While prune juice can help move things along, it should not replace healthy lifestyle habits aimed at preventing constipation in the first place. Here are some key things to focus on: 1. Stay hydrated – Make it a priority to drink at least 8 cups of non-caffeinated fluids like water, herbal tea, soup broths which keep the stool from becoming too hard and dry. 2. Eat high fiber foods – Aim for 25-30g of fiber from vegetables, fruits, whole grains and legumes which form the bulk of soft, bulky stool. 3. Exercise most days – Physical movement accelerates the passage of food through the intestines for more timely bowel movements. 4. Establish a toilet routine – Going to the bathroom at the same time daily like first thing in the morning

Health Benefits of Papaya Leaves
Home Remedies, Medicinal Herbs

12 Health Benefits of Papaya Leaves

12 Health Benefits of Papaya Leaves 12 health benefits of papaya leaves are: Boosts Platelet Count in Dengue Fever Anti-Inflammatory Properties Antioxidant Effects Supports Digestive Health Blood Sugar Regulation Potential Anticancer Properties 7. Immune System Support 8. Liver Health 9. Skin Health 10. Heart Health 11. Menstrual Relief 12. Respiratory Health Papaya leaves are a rich source of nutrients and bioactive compounds, offering a variety of health benefits. These benefits are supported by traditional medicine practices and emerging scientific research. Below is an overview of the key health advantages of papaya leaves: Boosts Platelet Count in Dengue Fever Papaya leaf extract is widely recognized for its ability to significantly increase platelet counts in dengue fever patients. This property is attributed to its bioactive compounds, which help combat thrombocytopenia (low platelet levels), reducing the risk of severe bleeding and other complications. Papaya leaves contain bioactive compounds, including flavonoids, phenolic chemicals, and enzymes like papain, which stabilize cell membranes and reduce platelet destruction caused by the dengue virus. This helps restore platelet levels more rapidly. The extract also enhances the expression of genes like ALOX-12 and PTAFR, which are involved in platelet production and aggregation. A study involving 228 dengue patients showed a significant increase in platelet counts within 40–48 hours of administering papaya leaf juice compared to standard care alone. Other trials reported that patients treated with papaya leaf extract had shorter hospital stays and required fewer blood transfusions compared to control groups. Anti-Inflammatory Properties Papaya leaves contain flavonoids, alkaloids, and other compounds that exhibit strong anti-inflammatory effects. These properties may help alleviate symptoms associated with chronic inflammatory conditions such as arthritis, asthma, and autoimmune disorders Anti-Inflammatory Action: Inhibition of Pro-Inflammatory Cytokines: Papaya leaf extract has been shown to suppress the production of pro-inflammatory cytokines like interleukin-1β (IL-1β), IL-6, and tumor necrosis factor-alpha (TNF-α). These cytokines are key mediators in the inflammatory response Reduction of Oxidative Stress: The flavonoids and phenols in papaya leaves act as antioxidants, neutralizing free radicals that contribute to inflammation and tissue damage Enzymatic Modulation: Papain, a proteolytic enzyme in papaya leaves, helps regulate inflammation by breaking down proteins that may trigger inflammatory responses. It also reduces inflammatory markers like cyclooxygenase-2 (COX-2) and nitric oxide (NO). Stabilization of Cell Membranes: Papaya leaf extracts stabilize red blood cell membranes, preventing cell lysis and reducing inflammation. This mechanism is comparable to the effect of standard anti-inflammatory drugs like diclofenac sodium Antioxidant Effects Rich in antioxidants like vitamins C, A, and E, as well as flavonoids, papaya leaves help neutralize free radicals in the body. This reduces oxidative stress, which is linked to aging and chronic diseases such as cancer and cardiovascular conditionsleo. Key antioxidant compounds in papaya leaves: Vitamin C: A potent antioxidant that helps neutralize free radicals, reducing oxidative stress and preventing cellular damage. Carotenoids: Particularly lycopene and beta-carotene, which not only provide color but also protect cells from oxidative damage. Flavonoids: These compounds exhibit strong antioxidant properties that help combat inflammation and support overall health. Health Benefits Associated with Antioxidant Effects: Cancer Prevention: The antioxidants in papaya leaves may help lower cancer risk by reducing free radical activity that contributes to tumor development. Some studies have indicated that papaya extracts can inhibit the growth of cancer cells in vitro, particularly breast and prostate cancer cells. Heart Health: Antioxidants prevent the oxidation of cholesterol, which is a significant risk factor for heart disease. By maintaining healthy cholesterol levels and reducing inflammation, papaya leaves may contribute to cardiovascular health. Skin Health: The antioxidant properties of papaya leaves can protect skin cells from UV damage and aging signs by combating oxidative stress. Studies have shown that lycopene supplementation can reduce skin redness after sun exposure and improve overall skin appearance. Eye Health: Compounds like zeaxanthin and carotenoids found in papaya leaves may protect against age-related macular degeneration and other vision-related issues by filtering harmful blue light and reducing oxidative stress on the retina Supports Digestive Health Papaya leaves are highly beneficial for digestive health due to their rich content of enzymes, fiber, and bioactive compounds. Here are the key ways in which they support digestion: 1. Enzymatic Support: Papaya leaves contain two powerful proteolytic enzymes, papain and chymopapain, which aid in breaking down proteins into smaller peptides and amino acids. This enhances nutrient absorption and reduces common digestive issues such as: Bloating Gas Indigestion 2. Relief from Digestive Disorders Papaya leaves are highly beneficial for digestive health due to their rich content of enzymes, fiber, and bioactive compounds. Here are the key ways in which they support digestion: Papaya leaf juice is effective in alleviating symptoms of digestive conditions like: Irritable Bowel Syndrome (IBS): It soothes the gut lining and reduces inflammation, helping manage symptoms like bloating and irregular bowel movements17. Acid Reflux: Its anti-inflammatory properties can help reduce irritation in the esophagus and stomach lining. 3. Fiber Content The high fiber content in papaya leaves supports regular bowel movements, preventing constipation. Fiber also promotes a healthy gut microbiome by encouraging the growth of beneficial bacteria 4. Ulcer Treatment Papaya leaves have been traditionally used to treat stomach ulcers. Their compounds help protect the stomach lining and promote healing by reducing acidity and inflammation 5. Detoxification Papaya leaves act as a natural detoxifier by promoting the elimination of toxins through urine and feces. This cleansing effect improves liver function, which is closely tied to digestion 6. Anti-Parasitic Properties Papaya seeds and leaves contain bioactive compounds that combat intestinal parasites, further supporting digestive health by maintaining a clean intestinal environment Usage Recommendations Juice: Papaya leaf juice can be consumed to improve digestion. It is typically prepared by blending fresh leaves with water and straining the mixture. Tea: Boiling papaya leaves to make tea is another popular method for reaping its digestive benefits. Blood Sugar Regulation Papaya leaves have gained attention for their potential role in regulating blood sugar levels, particularly in the context of diabetes management. Research indicates that extracts from papaya leaves may exert hypoglycemic effects, making them a subject of interest in

Bulk-Forming Laxatives: For Constipation
Home Remedies, Ailment, Medicinal Herbs

Bulk-Forming Laxatives: For Constipation

Bulk-Forming Laxatives: For Constipation Introduction: Bulk-forming laxatives are a safe and gentle option for relieving constipation and supporting overall colon health. As their name suggests, these laxatives work by increasing the bulk and water content of stools, which stimulates bowel movements. Bulk-forming laxatives represent a cornerstone in the management of constipation, offering a physiologically harmonious approach to restoring bowel regularity. As first-line agents recommended by major gastroenterological societies, these fiber-based therapies work synergistically with the body’s natural processes to soften stool, enhance colonic motility, and promote sustained bowel health. This review synthesizes current evidence on their mechanisms of action, therapeutic applications across patient populations, comparative effectiveness against other laxative classes, and optimal clinical usage strategies, while addressing emerging research directions in gastrointestinal therapeutics. Key Takeaway: Bulk-forming fiber supplements like Metamucil and Citrucel provide gentle, effective constipation relief by absorbing water to create softer, easier-to-pass stools. Unlike stimulant laxatives, they work naturally and are safe for regular use. Start with recommended doses and increase gradually for best results in improving bowel regularity. What Are Bulk-Forming Laxatives? Bulk-forming laxatives, also sometimes called fiber laxatives, are a type of laxative made up of plant fibers that absorb water and swell up to form bulky stools. This increased bulk stimulates the intestines, encouraging bowel movements. Some common brand names for bulk-forming laxatives include: Metamucil Citrucel Benefiber FiberCon These laxatives come in powder, tablet, capsule, and granule forms made up of ingredients like: Psyllium husk Methylcellulose Calcium polycarbophil Wheat dextrin Unlike stimulant laxatives, which force bowel movements, bulk-forming laxatives work more gently over the course of 12–72 hours. The fiber forms a gel-like mass that essentially pushes waste through the intestines. How Do Bulk-Laxatives Work? Bulk-forming laxatives derive their laxative effect from soluble fibers that dissolve or swell in water. These types of fibers attract and absorb liquid as they move through the gastrointestinal tract. As the fiber travels to the large intestine, it forms a soft, bulky stool that stimulates nerves in the intestinal lining. This triggers stronger waves of muscle contractions known as peristalsis. The extra fluid also makes stools easier to pass. With regular use, bulk-forming laxatives help produce soft, well-formed bowel movements, reducing symptoms of constipation. They may also assist with: Increasing fiber intake Cleansing and detoxifying the colon Improving regularity/preventing hemorrhoids Supporting weight loss goals The Benefits of Taking Bulk-Forming Laxatives Gentle and Effective Minimal Risk of Dependence Improve Overall Colon Health Reduce Gentle and Effective Bulk-forming laxatives stimulate your body’s natural ability to keep waste moving. Rather than forcing bowel movements like stimulant laxatives, bulking agents move things along more gently. Minimal Risk of Dependence People do not tend to become dependent on bulk laxatives with long term use. Since they aid your body’s natural processes, there is a lower risk of laxative abuse. Improve Overall Colon Health With regular use, bulk laxatives help support healthy digestion and may lower the risk of hemorrhoids, diverticular disease, colon polyps and cancer. Reduce Hemorrhoid Flare-Ups Bulk laxatives can reduce the pressure, straining and aggravation caused by constipation and hard stools. This may significantly improve hemorrhoid symptoms. Support Weight Loss Goals Proper elimination of waste plays a key role in weight management. Bulking agents can boost feelings of fullness and discourage overeating as part of a diet. Types of Bulk-Forming Laxative Supplements There are several different bulk-forming fibers used in laxatives. While they all work similarly, they come from different sources and have some unique properties. 1. Psyllium Husk Psyllium is a type of seed husk derived from the Plantago ovata plant. It absorbs significant amounts of water and forms a thick gel. Brands like Metamucil contain psyllium and are known for producing large, soft stools. Benefits The most potent bulk fiber Markedly increased stool size Also provides prebiotics to nourish good bacteria Considerations Can cause more initial gas or cramping More potential to impact medication absorption 2. Methylcellulose Fiber supplements made with methylcellulose typically go by the brand name Citrucel. The methylcellulose forms a gel-like substance that softens stools. Benefits Less likely to cause gas/bloating Non-fermentable by bacteria Considerations May not increase stool bulk as much as other sources 3. Calcium Polycarbophil Calcium polycarbophil functions as a bulking agent but also soaks up excess fluid. Common brands include FiberCon. Benefits Reduces diarrhea along with constipation symptoms This may result in more predictable, normalized stools Considerations Contains calcium so those with renal issues need to use it cautiously 4. Wheat Dextrin Wheat dextrin supplements provide soluble fiber shown to increase stool bulk and moisture content. Benefiber uses wheat dextrin. Benefits Tolerated well with minimal side effects Also provides prebiotic nourishment to gut flora Considerations Avoid if sensitive to gluten ingredients May interact with diabetes medications Bulk-Forming Laxative Dosage Guidelines Most bulk-forming laxative products provide dosing instructions on their labels. It’s important to follow these carefully, especially when first taking bulk fiber supplements. General dosage guidelines include: Powders: Mix 1-3 teaspoons (depending on brand) into 8 ounces of water or juice 1-3 times per day Tablets/Capsules: Take 2-6 tablets with 8 ounces water 1-3 times per day Granules: Start with a single packet (or equivalent of about 2.5 grams fiber) daily. When it comes to bulk laxative dosage, start low and go slow. Begin with just a small amount of fiber supplement each day and slowly increase the dose allowing your body to adjust. Ramp up your intake to the recommended dosing levels or to an amount that provides regular, comfortable bowel movements without side effects like gas, bloating or diarrhea. It often takes 12-24 hours to feel the full effects of bulk laxatives. Side Effects from Bulk Laxatives Most people tolerate bulk-forming laxatives well, especially if they gradually increase their dosage. However some potential side effects can include: Bloating Excess Flatulence Abdominal Pain Diarrhea (from too high of a dose) Nausea Intestinal Gas Improper absorption of medications taken concurrently These symptoms often resolve within a few days as your digestion adjusts. However, stop taking any bulk-forming laxative right away if you experience severe reactions like vomiting, difficulty breathing, rash or

Can Constipation Cause Back Pain?
Ailment, Home Remedies, Medicinal Herbs

Can constipation cause back pain?

Can constipation cause back pain? While constipation does not directly cause back pain, the intense strain associated with difficult bowel movements can exacerbate muscle tension and spinal issues, leading some to ask, “Can constipation cause back pain?”. Since constipation contributes to poor posture, strained muscles, and inflammation, it may make preexisting back injuries worse so many wonder whether infrequent bowel movements could be related to their worsening back discomfort. Constipation is an uncomfortable and often painful condition that affects nearly everyone at some point. It occurs when bowel movements become difficult or less frequent. As stools move more slowly through the digestive tract, they lose moisture and become hard and dry, making them painful or difficult to pass. Many people experience back pain, which can originate from muscle tension, injuries, arthritis, structural problems with the back, and a variety of other causes. With both constipation and back pain being relatively common issues, some people wonder if there is any connection between the two. While constipation does not directly cause back pain in most cases, it can potentially contribute to or worsen existing back discomfort in some people. Understanding the indirect links between constipation and back pain can help you find relief by addressing the root causes. How Does Constipation Contribute to Back Pain? Although medically there is no direct causation, multiple studies have found associations between chronic constipation and back pain, especially lower back discomfort. Here are some of the potential ways doctors theorize constipation may worsen, contribute to or fail to resolve certain preexisting back pain issues: 1. Back Muscle Strain from Bowel Straining The intense abdominal contraction and downward pushing involved when straining to pass a difficult bowel movement engage the core muscles which support proper posture and stability. As these muscles tighten, surrounding areas like the lower back may overextend or spasm as well. Repeated muscle strain over months or years is known to inflame tendons, compress spinal discs, tear muscle fibers, stiffen ligaments or create uneven posture misalignments leading to chronic back discomfort. Those with preexisting back injuries or structural weaknesses often report more pain after constipation episodes involving intense pushing or long periods seated on the toilet. Studies have shown a correlation between back pain and excessive straining due to chronic constipation issues. Researchers theorize that this constant muscle strain eventually fatigues supportive connective tissues, destabilizes joints, pinches nerves or directly damages muscle in the lower back region. 2. Postural Changes In an effort to alleviate the painful abdominal cramping or pressure of constipation, most people instinctively tense their core muscles and twist, curve or stretch the back to find relief. Over weeks or months, these postural compensations can strain supporting back ligaments, destabilize spinal alignment or create painful muscle spasms. Hunching forward compresses discs and transfers pressure onto muscles instead which may ache in response. Twisting or arching the back unevenly also strains stabilizing tissues eventually leading to imbalances or injury. Those with preexisting back injuries report their pain often worsens noticeably when constipated, likely due to these postural shifts during episodes. Additionally, the frequent urge to strain or sit for long periods in the bathroom trying to defecate shortens hip flexors and tightens muscles like the piriformis, which can refer pain into the lower back, incorrectly assumed to originate from spinal issues. Key Takeaways: Can Constipation Cause Back Pain? While no direct causative link exists between constipation and back pain, chronic constipation contributes to repetitive back muscle strain, poor posture, and painful cramping that can exacerbate underlying spinal weaknesses or injuries. Intensely contracting abdominal muscles to push out hardened stool during constipation episodes puts unequal pressures on surrounding areas like the lower back over time, leading to painful inflammation or spinal misalignments. Doctors advise improving diet with more fiber and fluids, light stretches, positional adjustments and occasional laxative use to alleviate related back aches by supporting healthy, regular bowel movements long-term. 3. Pressure on Surrounding Organs As dry, dense stool accumulates in a backed-up colon system, it enlarges and puts outward pressure on nearby organs, including those supporting the lower back. The colon lies against both the psoas muscles and quadratus lumborum in the lumbar region on either side of the spinal column.   4. Gas and Bloating Side Effects Constipation often causes uncomfortable gas and bloating which can indirectly lead to back pain as well. Build up of intestinal gas puts internal pressure on surrounding organs including muscles supporting the lower back. This prompts tense muscle guarding responses along with painful spasms or cramps. Additionally when constipated, people often exhibit poorer posture, slumping forward in an attempt to relieve painful gas or pressure in their abdomen. This slouched stance long-term erodes supportive back muscles leading to injury risk and eventual disc compression or misalignments of the spine. So while gas itself does not generate back pain directly, the accompanying muscle tension, cramping and postural responses can strain tissues contributing to chronic back discomfort. Addressing the root issue of constipation causing gas build up alleviates this side effect. Potential Links Between Constipation and Back Pain In addition to the indirect impacts described above, researchers have identified other links between digestion issues and back discomfort including: Shared contributing factors – Constipation and back pain share risk factors like sedentary lifestyles, poor dietary habits with inadequate fiber, nutritional deficiencies, spinal injuries, and side effects from prescription medications. So conditions present that make someone prone to one issue likely predispose them to the other as well. Medications – Certain drugs used to address back pain like narcotics or muscle relaxants have constipation listed as a potential side effect. At the same time, pain medications containing codeine given for intestinal cramping often cause painful hardening of stools. Medical conditions – Diseases known to cause back pain like spinal arthritis, skeletal irregularities, osteoporosis, fibromyalgia and herniated discs have also been shown to contribute to constipation frequency by impeding mobility of waste through the colon. So while not a direct causation, constipation and back pain do have overlaps in origin influenced by lifestyle factors,

How to Grow Oregano at Home
Medicinal Herbs, Home Remedies

How to Grow Oregano at Home

How to Grow Oregano at Home Introduction Imagine stepping into your kitchen and snipping fresh, aromatic oregano leaves for your favorite Italian dish. Growing oregano at home isn’t just possible – it’s surprisingly simple! Whether you’re a seasoned gardener or just starting your herb garden journey, this guide will walk you through everything you need to know about cultivating this versatile Mediterranean herb. Oregano (Origanum vulgare) has been cherished for centuries, not only for its robust flavor but also for its medicinal properties. As a perennial herb in the mint family (Lamiaceae), it’s one of the most rewarding plants you can grow, offering years of harvests with proper care. Key Takeaway Oregano thrives in specific soil conditions – it needs well-draining soil with a pH between 6.0 and 7.0, and actually produces more flavorful leaves in less fertile soil.  early spring and mid-season. The best time to harvest oregano is in the morning after the dew has dried, before the plant flowers, and only once the stems are at least 6 inches tall (typically about 6 weeks after planting). Harvesting at these times ensures the best flavor and plant health. Prevention is key for pest control – maintaining plant health through proper growing conditions (6-8 hours of sunlight, good airflow), regular inspection, and cleanliness of gardening tools can prevent most pest problems.  Understanding Oregano Basics Before diving into cultivation techniques, let’s explore the different types of oregano you might encounter Growth Characteristics Height: 12-24 inches Spread: 12-18 inches Flowering: Small purple or white flowers Growing Zone: 4-10 Sun Requirements: Full sun to partial shade How to Grow Oregano at Home: Getting Started Choosing Your Growing Method. You can start growing oregano through several methods: From Seeds From Cuttings From Transplants From SeedsSow oregano seeds indoors 6-8 weeks before last frostMaintain soil temperature at 70°F (21°C)Expect germination in 7-14 day From CuttingsTake 4-6 inch stemsRemove lower leavesPlace in water or moist soilRoots develop in 2-3 weeks From TransplantsChoose healthy young plantsLook for robust scent and strong stemsAvoid flowering specimens Soil Calculator for Container Growing oregano Container Soil Calculator Container Diameter (inches): Container Depth (inches): Calculate Soil and Planting Requirements Oregano thrives in well-draining soil with a slightly alkaline to neutral pH, ideally between 6.0 and 7.0. Sandy loam or loamy soil is suitable, as it allows water to move through easily while retaining enough moisture. When growing oregano, make sure the soil has a pH between 6.5  For container gardening, use a high-quality potting mix that provides good drainage and is enriched with organic matter.  You can also create a homemade soil mix by combining equal parts of sandy loam and compost, then adding perlite or vermiculite for aeration and a bit of dolomitic lime to balance the Oregano thrives in well-draining soil with these characteristics:pH level: 6.0-7.0Texture: Light and sandyOrganic matter: ModerateDrainage: Excellent Mix your potting soil using:60% high-quality potting soil20% perlite or coarse sand20% organic compost How can I test the pH of my soil for oregano Oregano thrives in well-drained soil with a pH between 6.0 and 8.0. Here’s how to test your soil pH: DIY Testing Kits: Collect a soil sample from your garden. Ensure the sample is collected from where the plant roots will grow, typically about 6 to 8 inches deep. Remove any roots, grass, or mulch from the sample Mix the soil sample with distilled water as per the kit instructions. Add the testing solution and compare the color change to the provided scale. Slurry Test: Mix one part soil with one or 1.5 parts distilled water in a container. Mix or shake the mixture and let it settle for about 15 minutes. Use a pH pen/meter or pH strip to get a reading, which will give you an approximate pH of the soil. Soil pH Meter: Moisten the soil with water before testing. Insert the meter into the soil and leave it for the time recommended by the manufacturer. Check the reading on the meter for a fairly accurate pH level. Professional Soil Testing Services: Send soil samples to a professional testing service or your local county extension office for a more accurate reading. These services will provide a detailed report of your soil’s pH level and mineral and nutrient levels. Home test kits may not be as accurate as professional lab services for detailed nutrient analysis How to adjust the soil pH if it’s too high or too low for oregano To adjust your soil pH for growing oregano, here’s what you can do based on whether the pH is too high (alkaline) or too low (acidic): If the Soil pH Is Too High (Alkaline): Add Sulfur: Incorporate sulfur into the soil. Soil microbes will break the sulfur down into sulfuric acid, which lowers the pH over time.A general guideline is to add 1 to 2 pounds of sulfur per 100 square feet, but this may vary based on your soil’s current pH. Acidify Irrigation Water: Adjust the pH of your irrigation water, especially if you have alkaline water. This is particularly useful in high tunnels where rainwater doesn’t naturally wash out soluble salts5. Incorporate Peat Moss: Mix peat moss into the soil to help lower the pH. If the Soil pH Is Too Low (Acidic): Add Lime: Incorporate lime into the soil. Use dolomitic or calcitic lime, and follow the application rates recommended by a soil test. Generally, 1 to 2 tons per acre is a good starting point, but always check your soil’s needs first. General Tips: Test Regularly: Monitor your soil pH every 6 to 12 months after making adjustments to ensure it remains in the optimal range for oregano1. Gradual Adjustments: Make pH adjustments gradually. Professional Testing: Consider using professional soil testing services for more precise results, especially if you suspect significant nutrient imbalances. Organic Practices: Combine pH adjustments with organic gardening practices like using compost, mulches, and organic fertilizers. How to lower your soil pH Here’s a general guideline based on soil texture, measured in pounds of sulfur per acre to a depth of 6 inches For individual

How to make oregano tea
Home Remedies, Medicinal Herbs

How to make oregano tea

How to make oregano tea Ingredients: To make oregano tea, you can use either fresh or dried oregano and steep it in hot water.  Oregano tea can be made in approximately 5 minutes. This herbal tea is a cozy drink that may provide relief and nutritional benefits. 1 or 2 sprigs of fresh oregano, or 2 teaspoons of dried oregano 1 1/2 cups of water Optional: honey, lemon, lime, or orange slice to taste Instructions: Boil water in a saucepan or tea kettle. If using fresh oregano, wash the sprigs or leaves. Place them in a mug and lightly mash the leaves to release their oils. If using dried oregano, place it in a tea strainer or tea bag and put it in a cup. Pour boiling water over the oregano. Let the tea steep for 2 to 5 minutes. Steeping it longer will result in a more intense flavor, but oregano has a bitter taste. Remove the oregano leaves with a tea strainer, in a cup.. Add honey or a slice of lemon or orange to taste, if desired, and stir. Oregano tea benefits What is oregano? as you might have heard,it is a culinary herb that offers a distinctive flavor and aroma to foods. With its zesty, slightly bitter and minty notes, oregano has become a staple in various global cuisines. From pizza and pasta dishes to meat, vegetables and more, oregano can enhance the taste and even provide potential health benefits. This comprehensive guide will explore all aspects of oregano – its history, varieties, culinary uses, nutrition facts, health benefits, how to grow it, and ways to cook with this aromatic herb. Read on to learn everything you need to know about oregano! Key takeaways Versatility and Preparation Options Oregano can be used in multiple forms: fresh, dried, as tea, or preserved. The herb can be preserved in six different ways (drying, freezing, oil infusion, pesto, vinegar infusion, and salt/sugar mix). Each variety (Mediterranean, Greek, Italian, Mexican, and Turkish) offers unique flavor profiles for different culinary applications. 2. Significant Health Benefits with Important Precautions. Rich in antioxidants and antimicrobial properties. Offers eight major health benefits, including anti-inflammatory effects and digestive support. However, comes with potential side effects that require careful consideration, especially for those on medications or during pregnancy Nutrition Facts and Health Benefits of Oregano Here is the nutrition profile of 1 teaspoon (0.6 grams) of dried oregano according to the United States Department of Agriculture: Nutrition Facts Serving Size: 1 tablespoon (2g) Calories 6 % Daily Value* Total Fat 0.1g 0% Cholesterol 0mg 0% Sodium 1mg 0% Total Carbohydrates 1.2g 0% Dietary Fiber 0.8g 3% Sugars 0g Protein 0.2g Vitamin A 2% DV Vitamin C 3% DV Calcium 8% DV Iron 9% DV * Percent Daily Values are based on a 2,000 calorie diet. Packed with antioxidants and antimicrobial components, oregano offers some great health perks along with its bold, appetizing flavor.   Potential Health Benefits Several lab studies indicate oregano has beneficial bioactive compounds that may: Fight inflammation: Carvacrol and rosmarinic acid in oregano display anti-inflammatory activity useful for treating arthritis, pain and swelling. Boost immunity: With antimicrobial and antioxidant effects, oregano oils can strengthen the immune response and prevent infections. Support digestion: Oregano stimulates bile flow to improve digestion. Its oils relieve bloating, gut spasms and gas. Lower cholesterol: Some research notes oregano extract helps reduce LDL cholesterol and prevent fat accumulation in the liver. However, most studies have tested concentrated oregano extracts on cells. More human studies are needed to confirm these preliminary health benefits. But so far, early results seem promising! How many varieties of oregano here are over 50 species of oregano available. But for culinary purposes, Greek oregano, common oregano, and Italian oregano are more widely used. Oregano is a widely used herb in various cuisines around the world, primarily known for its robust flavor and versatility. The most commonly used types of oregano include. 5 Common Varieties of Oregano Mediterranean Oregano (Origanum vulgare) Greek Oregano (Origanum vulgare subsp. hirtum) Italian Oregano (a hybrid of Origanum vulgare and marjoram) Mexican Oregano (Lippia graveolens) Turkish Oregano (Origanum onites) Mediterranean Oregano (Origanum vulgare) This is the most prevalent variety, often referred to simply as oregano. It is a key ingredient in Mediterranean cuisine, especially Italian and Greek dishes, where it enhances flavors in sauces, meats, and salads. The flavor is aromatic with a slightly peppery taste Greek Oregano (Origanum vulgare subsp. hirtum) A specific subspecies of Mediterranean oregano, Greek oregano is known for its strong flavor and is frequently used in Greek cooking, particularly in dishes like Greek salad and grilled meats Worldwide Oregano Production (2014-2023) Year Turkey Mexico Greece Morocco Peru 2023 14,500 12,800 8,200 6,500 5,800 2022 14,200 12,500 8,000 6,300 5,600 2021 13,800 12,200 7,800 6,100 5,400 2020 13,500 11,900 7,600 5,900 5,200 2019 13,200 11,600 7,400 5,700 5,000 2018 12,800 11,300 7,200 5,500 4,800 2017 12,500 11,000 7,000 5,300 4,600 2016 12,200 10,700 6,800 5,100 4,400 2015 11,900 10,400 6,600 4,900 4,200 2014 11,600 10,100 6,400 4,700 4,000 Italian Oregano (a hybrid of Origanum vulgare and marjoram) This variety combines the flavors of both oregano and marjoram, making it popular in Italian cuisine for pasta sauces and pizza Mexican Oregano (Lippia graveolens) Although not botanically an oregano, this variety has a flavor profile that complements Mexican and Southwestern U.S. dishes like chili con carne. It is stronger and more citrusy than Mediterranean oregano Turkish Oregano (Origanum onites) Used extensively in Turkish cuisine, this type has a slightly different flavor but shares culinary applications similar to Mediterranean oregano 8 Health Benefits of Oregano Oregano is not only a popular culinary herb but also offers various health benefits attributed to its rich nutrient profile and bioactive compounds. Here are some of the notable health benefits of oregano: Health Benefits of Oregano Antioxidant Properties.Oregano is rich in antioxidants, which help combat oxidative stress in the body. The presence of compounds like carvacrol and thymol contributes to its ability to neutralize free radicals, potentially reducing the risk of chronic

When does an aloe vera plant bloom?
Home Remedies, Medicinal Herbs, Weight loss

When Does An Aloe Vera Plant Bloom?

When Does An Aloe Vera Plant Bloom? Aloe vera is a popular house plant known for its fleshy, succulent leaves and natural health properties. But did you know that aloe plants can also produce beautiful flowers when they bloom? ” Aloe vera needs to be at least four years old to flower.” Getting an aloe vera to flower may take some patience, but the effort pays off in the end. When they decide to bloom, aloe plants send up tall stalks topped with tubular-shaped flowers that resemble lilies. In this comprehensive guide, we will explore everything you need to know  about aloe vera blooms including: What aloe flowers look like The blooming season for aloe plants Signs your aloe is going to bloom Why your aloe might not be blooming Caring for a blooming aloe vera And how to use aloe vera flowers When is Aloe Vera’s Blooming Season? Aloe vera plants generally bloom in late winter into spring. The blooming months are usually February through April in their native tropical and sub-tropical environments. When grown indoors, aloe plants may begin sending up flower stalks as early as January and continue blooming through May or even early June. Peak aloe vera blooming season is March and April. When does an aloe vera plant bloom? Luckily, aloe plants give some clues that they are preparing to send up flower spikes. Here are the signs that your aloe is going to put on a floral display. Aloe Vera Flower Stalks Emerge First The most obvious indicator that an aloe plant is going to bloom is the emergence of a flower stalk (also called a raceme). The stalk begins growing out of the center of the plant, separate from the succulent leaves. At first, the stalk may be short before it elongates over the course of a few weeks. Eventually, the stalk can reach 2-3 feet tall in mature indoor aloe plants. Outdoors, the flower spikes can tower as tall as 6 feet! Faster Growth of Aloe Vera Leaves Another hint your aloe might bloom is increased growth speed of the succulent leaves. As the plant prepares to redirect energy and nutrients into flowers, you may notice more rapid leaf growth. New pups developing around the base more quickly can also signify pending blooms. Aloe Vera Flower Appearance Once the flower stalks emerge from an aloe plant, delicate blooms will start opening up at the top of the spikes. But what do aloe flowers actually look like? Aloe blossoms resemble tubular or bell-shaped flowers like lilies. They grow off of branching stems in dense clusters along the upper portion of the flower stalk. The blossoms come in shades of red, yellow, orange, or pink. Some aloe hybrids have exotic bicolored flowers as well. Flowers are around 1-2 inches long and slightly curved. At the mouth of the blossoms are visible reproductive parts including the pollen-laden anthers and the stigma. Nectar develops at the base of the flowers to attract pollinating birds and insects (more on that later). As magnificent as the floral show looks, it is usually short-lived. Individual aloe flowers only remain open for 1-2 days before withering. But the bloom show can continue for up to a month since new flowers continue budding as old ones fade. Why Isn’t My Aloe Vera Blooming? If your aloe vera is not blooming, don’t fret. There are several reasons why an aloe plant may not flower. Age of the Aloe Vera Plant For starters, aloe vera plants need to reach maturity before they will start flowering. Generally, it takes 2-4 years for plants grown from pups to be old enough to bloom. If you just acquired a small, young aloe this year, be patient and give it more time to age. Fertilization and proper care will speed up the growth rate and get your plant ready to flower sooner. Improper Care Preventing Blooms An aloe vera that is not blooming could indicate it is not receiving the right care to trigger flowering. Here are some of the most common issues that inhibit aloe plant blooms: Insufficient sunlight – Aloes require several hours per day of bright, direct light. Too much shade will hinder flowering. Overwatering – Excess moisture retards growth and causes disease. Allow soil to partially dry out between waterings. Underfeeding – Lack of nutrients limits plant health. Use cactus fertilizer every few months. Repotting shock – Frequent repotting disturbs root development and delays maturity. Only repot when rootbound. Fix any care issues first and your aloe should respond by growing faster and preparing to flower. Shock from Repotting Too much disruption to the root system from repotting can also throw an aloe plant off from wanting to bloom that season. It’s best not to repot aloes (or split up pups) right before their flowering window unless absolutely necessary. Give plants time to settle into new pots before expecting peak performance.   Caring for Blooming Aloe Vera Plants Getting an aloe to produce a gorgeous flower display feels like a great triumph. Now it’s time to give your blooming beauty the care it needs: Sunlight When an aloe plant begins flowering, it has high energy demands. Having sufficient sunlight is crucial for photosynthesis. Place flowering aloe veras in bright, sunny windows where they will receive at least 4-6 hours of direct sunlight daily. South or west-facing positions are ideal. You can also provide supplemental light from grow lights if natural light is inadequate, WaterThe rapid growth of flower stalks also makes aloes extra thirsty. Ramp up watering frequency to every 10-14 days while plants are actively blooming. Allow the soil to partially dry out before saturating it completely. Then let excess moisture drain away before returning pots to drip trays. FertilizerUsing cactus fertilizer every 2-4 weeks during the blooming period gives aloe plants an extra nutrient boost. Look for formulas higher in phosphorus to stimulate prolific flowering. Organic liquid fertilizers like fish emulsion, worm castings, or compost tea also make excellent aloe blooming tonics. Staking Up FlowersAs flower stalks lengthen, they can start to droop under the weight of so many dense

aloe vera gel
Home Remedies, Medicinal Herbs

Using aloe vera gel for razor bumps

Using aloe vera gel for razor bumps Razor bumps can be a real nuisance. Those small, red bumps that appear after shaving can cause discomfort, irritation, and can even get infected if you pick at them. But don’t worry – there’s a natural solution to help both treat and prevent razor bumps. Aloe vera gel has been used for centuries to soothe and heal various skin conditions. With its anti-inflammatory and antimicrobial properties, aloe vera makes an excellent remedy for those unpleasant razor bumps. Read on to learn why aloe vera is so effective on razor bumps , how to use it properly and after shaving, and extra tips to stop razor bumps in their tracks! What Are Razor Bumps? Before learning how aloe vera gel can help, let’s understand exactly what causes razor bumps. Razor bumps are small, raised red spots that develop after you shave. They are most common in areas where hair tends to be coarse and curl back into the skin instead of growing straight out—places like the neck, armpits, and bikini line. Razor bumps occur when freshly shaven hairs get trapped under the skin’s surface. As the ends of the sharply cut hairs grow back, they curl into the skin instead of straightening out. The hair tries to exit the skin as it grows, causing inflammation and a raised red bump. These bumps can become very sore and irritated, even leading to infection if they are picked or scratched excessively. Razor bumps usually take a few days to resolve on their own as the hairs eventually grow out, but using aloe vera gel can quicken healing. Now that you know what causes these annoying bumps, let’s look at how aloe vera gel can help provide relief Common Locations for Razor Bumps The areas most prone to ingrown hairs and razor bumps include: Neck Armpits Pubic area/Bikini line Face (men who shave) Legs Underarms These areas all contain dense hair growth more prone to ingrown hairs. The friction caused by clothing rubbing against freshly shaven body parts also makes the problem worse. Key Takeaways Razor bumps happen but that doesn’t mean you have to suffer with ongoing irritation or infection! By applying aloe vera gel onto shaved skin before and after hair removal, those unsightly bumps can be prevented and treated thanks to aloe’s natural healing properties Use pure aloe generously 2-3 times per day directly onto bumps to reduce swelling plus numb pain. And be sure to take preventative measures like exfoliating properly and using sharp razors. In most cases staying diligent with an aloe vera gel routine results in bump-free beautiful skin over time. So ditch those razors bumps for good – your skin will thank you! How to make aloe vera moisturizer Ingredients: Aloe Vera Gel (2 tablespoons) soothes, hydrates, and heals the skin. Coconut Oil or Shea Butter (1 tablespoon): It moisturizes and locks in hydration. Jojoba Oil or Sweet Almond Oil (1 tablespoon)—lightweight oils that mimic the skin’s natural sebum. Essential Oils (optional, 5-10 drops) Add drops) and additional benefits (e.g., lavender for calming, tea tree for acne-prone skin). Vitamin E Oil (optdrops): 2 drops – Acts as a natural preservative and boosts skin repair. Instructions: Prepare the Aloe Vera Gel: If using fresh aloe vera, cut a leaf from the plant, slice it open, and scoop out the gel. Blend the gel until smooth. If using store-bought gel, ensure it’s 100% pure and free of additives. Melt the coconut or shea butter: Gently melt the coconut oil or shea butter in a double boiler or microwave. Let it cool slightly. Mix the ingredients: In a small bowl, combine the aloe vera gel, melted coconut oil or shea butter, and jojoba or sweet almond oil. Add a few drops of your chosen essential oil (if using) and vitamin E oil. Blend Thoroughly: Use a hand mixer or whisk to blend the ingredients until smooth and creamy. Store the moisturizer: Transfer the mixture to a clean, airtight container (preferably glass). Store in a cool, dry place or in the refrigerator to extend its shelf life. How to Use: Apply a small amount to clean skin, massaging gently in circular motions. Use daily in your skincare routine, preferably after cleansing and toning. Why Aloe Vera Gel Helps Soothe Razor Bumps The aloe vera plant contains a naturally clear gel that has been used topically for centuries to soothe various skin irritations. Modern science has also revealed the active compounds that give aloe its renowned healing abilities. Soothing Compounds Within Aloe Gel These healing compounds found in aloe vera gel can benefit razor bumps: Polysaccharides – Compounds that reduce inflammation and swelling of the skin Gibberellin – A growth hormone that stimulates the growth & anti-microbial activity of fibroblasts. Promotes faster healing. Bradykinase – An enzyme that reduces excessive inflammation Salicylic acid – Provides relief from itching and swelling while deeply moisturizing On top of containing these soothing ingredients, aloe vera gel also: Soothes redness and inflammation Moisturizes the skin without clogging pores Creates a protective barrier that prevents infection By applying these natural healing agents directly onto bumps multiple times a day, aloe vera gel can speed healing time and reduce irritation substantially. Using Aloe Vera Gel to Treat Existing Razor Bumps If those dreaded red bumps are already visible after hair removal, promptly apply aloe vera gel to help them disappear quicker. Directions to Use Aloe Gel on Razor Bumps Clean shaved area well with a mild soap and water first Pat skin dry with a clean towel Apply a liberal layer of pure aloe gel directly onto bumps Use enough gel so bumps glisten but not too much that they become drowned entirely Allow gel to dry fully on its own Reapply aloe vera gel 2-3 times per day until bumps are healed. Pure aloe vera gel can be generously applied multiple times per day onto existing razor bumps to quicken healing. Allow it to fully absorb into the skin in between applications. Continue using aloe gel on any inflammation, spots or bumps

Benefits of Aloe Vera: Nature's Soothing Succulent
Ailment, Home Remedies, Medicinal Herbs

Benefits of Aloe Vera: Nature’s Soothing Succulent

Benefits of Aloe Vera: Nature’s Soothing Succulent Aloe vera is an ancient succulent plant that has been used medicinally for millennia. With its gel filled leaves full of active compounds, this plant can soothe burns, treat skin conditions, support immune health, and more. Read on to discover why aloe vera is called the “miracle plant.” What is Aloe Vera? Aloe vera, often referred to as just aloe, is a short stemmed shrubby succulent plant that grows up to 2 to 3 feet tall. It originated in tropical regions of Africa, Asia, and Europe and is now grown worldwide. The leaves of the aloe plant are thick and fleshy, reaching 12-19 inches in length when fully grown. Inside the leaves is a clear gel that contains over 75 active compounds including: Vitamins: A, B12, C and E Minerals: Zinc, calcium, magnesium, copper, chromium and selenium Enzymes Sugars Anthraquinones: Provide analgesic and anti-inflammatory effects Fatty acids Auxins and gibberellins: Aid in anti-inflammatory and wound healing properties This multitude of nutrients and compounds is why aloe gel has so many topical and internal health benefits which we’ll explore throughout this article Top Benefits and Uses of Aloe Vera Gel With an array of vitamins, minerals, and healing compounds, it’s no wonder aloe vera gel has been called a “miracle plant.” Here are some of the top external and internal uses and health benefits of aloe gel and juice. Soothing Burns, Wounds and Skin Irritation Moisturizing and Anti-Aging Effects on Skin Supports Digestive Health Boosts Immune Function Regulates Blood Sugar Levels Soothing Burns, Wounds and Skin Irritation Using aloe topically has long been the primary benefit of the plant. The gel contains two hormones: Auxin and gibberellin which provide anti-inflammatory and wound healing properties. Applying aloe to burns and abrasions helps soothe inflammation and pain while speeding up skin regeneration. The antibacterial and antifungal aspects of aloe vera also prevent infections in damaged skin and wounds. Plus, the moisture within the gel creates a protective barrier allowing skin to retain moisture and recover faster. Moisturizing and Anti-Aging Effects on Skin In addition to healing wounds, regularly applying aloe vera gel hydrates facial skin leaving it less dry, supple, and glowing. The skin readily absorbs aloe due to its 97% water content. It also delivers key amino acids to strengthen the skin’s protein building blocks. With powerful antioxidants like vitamins C and E, aloe gel neutralizes skin-damaging free radicals to minimize fine lines and wrinkles. Its anti-inflammatory properties also calm redness and irritation in conditions like acne, eczema, and rosacea. like acne, eczema, and rosacea. With regular use, skin becomes smoother, firmer and more youthful-looking. How To Make Aloe Vera Moisturizer Ingredients: Aloe Vera Gel (2 tablespoons) – Soothes, hydrates, and heals the skin. Coconut Oil or Shea Butter (1 tablespoon) – Deeply moisturizes and locks in hydration. Jojoba Oil or Sweet Almond Oil (1 tablespoon) – Lightweight oils that mimic the skin’s natural sebum. Essential Oils (optional, 5-10 drops) – Add for fragrance and additional benefits (e.g., lavender for calming, tea tree for acne-prone skin). Vitamin E Oil (optional, 1-2 drops) – Acts as a natural preservative and boosts skin repair. Instructions: Prepare the Aloe Vera Gel: If using fresh aloe vera, cut a leaf from the plant, slice it open, and scoop out the gel. Blend the gel until smooth. If using store-bought gel, ensure it’s 100% pure and free of additives. Melt the Coconut Oil or Shea Butter: Gently melt the coconut oil or shea butter in a double boiler or microwave. Let it cool slightly. Mix the Ingredients: In a small bowl, combine the aloe vera gel, melted coconut oil or shea butter, and jojoba or sweet almond oil. Add a few drops of your chosen essential oil (if using) and vitamin E oil. Blend Thoroughly: Use a hand mixer or whisk to blend the ingredients until smooth and creamy. Store the Moisturizer: Transfer the mixture to a clean, airtight container (preferably glass). Store in a cool, dry place or in the refrigerator to extend its shelf life. How to Use: Apply a small amount to clean skin, massaging gently in circular motions. Use daily in your skincare routine, preferably after cleansing and toning. Top Aloe Vera Producing Countries Country Annual Production (Metric Tons) Major Growing Regions Primary Varieties Mexico 165,000 Tamaulipas, Yucatan, Jalisco Aloe barbadensis miller Dominican Republic 125,000 La Altagracia, Monte Plata Aloe barbadensis miller India 110,000 Rajasthan, Gujarat, Tamil Nadu Aloe barbadensis, Aloe vera indica Thailand 95,000 Nakhon Ratchasima, Prachin Buri Aloe barbadensis miller China 85,000 Hainan, Guangdong, Yunnan Aloe vera chinensis United States 75,000 Texas, California, Florida Aloe barbadensis miller Costa Rica 65,000 Guanacaste, Alajuela Aloe barbadensis miller Venezuela 55,000 Falcón, Lara Aloe barbadensis miller Supports Digestive Health Internally, aloe vera juice contains compounds known as anthraquinones that provide potent laxative effects. Drinking just 2-4 ounces can help ease constipation and promote regularity. Additionally, aloe vera coat and soothe gastrointestinal inflammation making it an effective remedy for inflammatory bowel diseases like ulcerative colitis. Its enzymes even aid in digestion by breaking down sugars and fats.   Boosts Immune Function Aloe leaves contain special polysaccharides along with antioxidants like vitamin C and E, which stimulate the immune system to fight bacterial and viral infections. Sipping just a couple of ounces each day may ward off everything from the common cold to more serious conditions. Regulates Blood Sugar Levels Early evidence suggests aloe vera may enhance insulin sensitivity and help normalize blood sugar in those with type 2 diabetes and prediabetes. When taken for several weeks, aloe vera capsules have been shown to lower A1C levels by as much as 1.5 points. Other Aloe Vera Benefits Alleviate heartburn and GERD Reduce cavities and gingivitis Lower cholesterol and triglycerides Treat osteoarthritis when taken orally Prevent kidney stones Provide anti-cancer properties. Alleviate Heartburn and GERD Preliminary studies indicate that drinking aloe vera juice may coat and protect the esophagus and stomach lining to calm heartburn and acid reflux symptoms. It may soothe ulcers as well with powerful anti-inflammatory effects. Reduce Cavities and

Mexican Cream guava
Medicinal Herbs

Mexican Cream Guava

Mexican Cream Guava —The Sweet Safari Variety Mexican Cream Guava, also known as “Mexican White” guava, is a tropical fruit native to Mexico and Central America. This variety is particularly noted for its creamy texture and distinctively sweet flavor. The Mexican cream guava lives up to its dreamy name. These round green fruits encapsulate a sweet vanilla and strawberry essence. Their creamy white interior packs a nutritious punch too. Let’s explore why Mexican cream guava belongs on your fruit safari list!   Overview of Mexican Cream Guava Mexican cream guava is a prized variety of common guava fruit belonging to the Myrtaceae plant family. In form, the oval rounded fruit has light green exterior skin covering its hallmark cream-colored flesh.   This interior creamy white pulp tastes subtly sweet and floral, reminiscent of wild strawberries or coconut cream. The aroma also evokes pleasant tropical vanilla notes. Thriving in Mexico’s warm habitats, today Mexican cream guava appears in specialty groceries globally thanks to thriving export markets. Let’s uncover more about this delectable fruit. Characteristics Flavor: The Mexican Cream Guava is exceptionally sweet with a creamy taste, making it a favorite among tropical fruit enthusiasts Appearance: The fruit typically has slightly yellow skin and white flesh. It is juicy and contains few seeds, enhancing its appeal for fresh consumption Aroma: This guava variety is known for its fragrant aroma, which adds to its desirability as a fresh fruit Details on Mexican Cream Guava Fruits The signature fruits contain sweet vanilla notes with strawberry and pear undertones. Each round oval guava reaches 5-10 cm in size when ripe. The smooth thin exterior skin shifts from dark to light green. Cutting open the interior reveals the trademark creamy white hue enclosing a soft, moist pulp. The flavor strikes a balanced sweetness and gentle acidity. Expect a milder profile compared to Red or Pink tropical guavas. The aroma also evokes coconutty vanilla scents. Seeds do exist but are entirely edible. Some characterize their texture akin to pomegranate arils. Nutritionally, Mexican cream guavas deliver ample fiber, vitamin C, potassium and antioxidant compounds like lycopene. Climate Needs for Mexican Cream Guava Trees To yield the beloved fruits, Mexican cream guava requires tropical or subtropical climates without any winter freezes. Trees thrive best in hot, humid equatorial areas. Mexican Cream Guava thrives in warm climates and requires well-drained soil. It can be grown in home gardens or orchards, providing both ornamental value and delicious fruit. The oval evergreen leaves emerge along sparsely branched trunks that may reach 15 meters tall at maturity in ideal settings. Masses of white flower petals precede fruit emergence. Well adapted to rainforests native to Mexico and Central America, Mexican cream guava trees need adequate water. Warm temperatures between 20°C to 35°C suit growth, with average annual precipitation levels around 1500mm preferred. How can I propagate a Mexican Cream Guava tree? Methods of Propagation 1. Seed Propagation Collect Seeds: Obtain seeds from ripe Mexican Cream Guava fruit. Clean the seeds to remove any pulp. Prepare Soil: Use a well-draining potting mix. A mix of sand and compost works well. Plant Seeds: Sow the seeds about 1/4 inch deep in the soil. Watering: Keep the soil moist but not soggy. Use a spray bottle for gentle watering. Light: Place the pots in a warm area with indirect sunlight until germination occurs, which may take several weeks. 2. Cutting Propagation Select Cuttings: Choose healthy, semi-hardwood cuttings from a mature tree, ideally during late spring or early summer. Prepare Cuttings: Cut sections about 6-8 inches long, ensuring each cutting has several leaves and at least one node. Rooting Hormone: Dip the cut end of each cutting in rooting hormone to promote root development. Plant Cuttings: Insert the cuttings into a pot filled with a well-draining mix. Water lightly. Humidity: Cover the pot with a plastic bag or dome to maintain humidity until roots develop, which may take several weeks. 3. Grafting Choose Rootstock: Use a healthy guava tree as rootstock. Select Scion Wood: Take a healthy branch from a Mexican Cream Guava tree. Graft Together: Make a clean cut on both the rootstock and scion and join them together, securing with grafting tape. Care for Graft: Keep the grafted area moist and shaded until it takes hold. General Care Tips Ensure that young plants receive plenty of sunlight (80-100% sunlight is ideal) and are watered regularly without waterlogging the soil For best results, transplant seedlings or rooted cuttings into larger pots or directly into the ground once they are strong enough to handle. By following these methods, you can successfully propagate your own Mexican Cream Guava trees. Consumption Uses for Mexican Cream Guava Mexican Cream Guava, known scientifically as Psidium guajava, is a tropical fruit celebrated for its unique flavor and versatility in culinary applications. Here are the primary consumption uses for this fruit: “In Mexican cuisine, guava is not only valued for its taste but also for its cultural significance. Various processed products such as candies, ice creams, and sauces highlight its importance in traditional dishes” Consumpting it fresh Raw Eating: The Mexican Cream Guava can be enjoyed fresh. Its creamy white flesh is thick and sweet, making it ideal for eating raw. Simply wash the fruit, slice it, and consume it as a snack or add it to fruit salads. Pairing: It pairs well with a sprinkle of salt or chili powder, enhancing its natural sweetness with a savory twist Culinary Uses Jams and Jellies: The guava’s high pectin content makes it suitable for making jams and jellies. Cooking the pulp with sugar creates a spreadable treat that captures the fruit’s flavor. Guava Paste: This concentrated form of guava can be used in both sweet and savory dishes. It serves as a filling for pastries or as a glaze for meats, adding a tropical flavor to various recipes. Desserts: Guavas can be incorporated into pies, tarts, and cobblers. Their natural sweetness complements baked goods beautifully. Beverages Juices and Smoothies: Guava juice is a popular way to enjoy this fruit. It

Medicinal Herbs, Home Remedies

33 Types Of Guava

What is a guava? Guava is a tropical fruit that belongs to the Myrtaceae family and is scientifically known as Psidium. Known for its sweet and aromatic flavor, guava typically has a green or yellowish skin, depending on the variety. The inner flesh can range from white to vibrant pink, and it’s punctuated with small seeds. The fruit’s texture varies from crisp to creamy, depending on the specific type. Guavas are not only delicious but also boast a rich nutritional profile. They are a good source of vitamins A and C, dietary fiber, and antioxidants. The fruit is often consumed fresh, either sliced or scooped out with a spoon, and its distinct taste makes it a popular ingredient in various culinary applications. The guava plant is an evergreen shrub or small tree, and it thrives in warm climates. Beyond its culinary uses, guava is appreciated for its potential health benefits, including immune system support, digestive health promotion, and skin enhancement. With its versatility and wide array of varieties, guava continues to be a beloved fruit enjoyed in many parts of the world. While most people may be familiar with the common yellow guava or pink tropical guava, there exists a world of different Psidium guajava varieties to discover. In this article, we will highlight 30 of the top and most prized guavas, covering an array of colorful types from across the globe. While most people may be familiar with the common yellow guava or pink tropical guava, there is a world of different Psidium guajava varieties to discover. In this article, we will highlight 30 of the top and most prized guavas, covering an array of colorful types from across the globe. We’ll explore popular green varieties like the Mexican Cream, Strawberry, and Allahabad Safeda guavas. For yellow varieties, we’ll cover options like the Behat Coconut, Lemon, and Thai Maroon guavas. Pink and red varieties like the Red Malaysian, Ruby Supreme, and Hong Kong Pink Guavas also make the list. Beyond color, we’ll look at distinguishing features like texture, taste, uses, origins, and growing conditions. Understanding the diversity of guava types lets you expand your palate and horticultural knowledge. So let’s dive into 30 of the most popular guavas found around the world! Let me know if you would like me to modify or expand on this draft introduction in any way. I’m happy to keep refining it to effectively set up your post on the top guava varieties 33 Varieties Of Guavas Mexican Cream Guava Strawberry Guava Tropical White Guava Allahabad Safeda Ruby Supreme Guava Red Malaysian Guava Pineapple Guava Lalit Guava Behat Coconut Guava Hong Kong Pink Guava  Apple Guava Fan Retief Guava Lemon Guava Guinea guava Thai Maroon Guava Variegated Guava Harijha guava 18. Lucknow 49 Guava19. Grape Guava20. Red Indian Guava21. Ahmedabad Pink Guava22. Chittidar Guava23. Safeda Lucknow Guava24. Pearl Guava25. Banarasi guava26. Seedless Thai Guava27. Arka Mridula28. Costa Rican Guava29. Bangkok Guava30. Cherry guavas 1. Mexican Cream guava With its round shape and smooth green skin, Mexican Cream guava is a prized variety. The creamy white interior flesh has a mildly sweet floral flavor that makes it perfect for eating raw. This type of guava originated in Mexico and works great in desserts, juices, and an array of other applications. 2. Strawberry guava The Strawberry guava gets its name from its vivid red interior that resembles a strawberry when cut open. With its green exterior and slightly tangy, sweet red pulp, it is excellent for making jams, beverages, and other treats. Native to South America, strawberry guava has become popular around the world, especially Hawaii. 3. Tropical White Guava Tropical White guava is a lovely smooth-skinned guava with a light yellow exterior. Its tender white flesh has a delicate, floral taste and creamy texture perfect for salads, smoothies, and eating raw. This variety thrives in tropical and subtropical climates, especially prized in places like Florida and Hawaii. 4.Allahabad Safeda Allahabad Safeda is a commercially popular variety of guava cultivated in northern India. It has a green to pale yellow skin when ripe and its white flesh is creamy with a mild sweet flavor. This guava is excellent for processing and also makes a refreshing juice. 5.Ruby Supreme guava With its vibrant hot pink exterior, Ruby Supreme guava is impossible to miss. The soft, sweet pink pulp inside provides delicious flavor perfect for snacking, juices, jellies. This visually striking guava variety thrives in tropical and subtropical regions like Florida and Hawaii. 6.Red Malaysian Guava Distinguished by its bright red skin and soft pink interior flesh, Red Malaysian guava has a sweet flavor with mild acidity. This variety is excellent for smoothies, snacks, baking, and other uses. Red Malaysian guava is native to Malaysia but also grown in many tropical regions now like Hawaii and Florida. 7.Pineapple Guava Pineapple guava is named for its distinctive tropical pineapple-like flavor and aroma. With smooth yellow skin surrounding white flesh, it is excellent for eating raw and cooking. This type originated in South America but is now grown in tropical climates worldwide. 8.Lalit Guava Lalit is a popular high-yielding guava cultivar developed in India. It has light green to yellow skin when ripe and creamy white flesh with few seeds inside. The Lalit guava is prized for its unique sweet-tart flavor and high vitamin C content. 9.Behat Coconut Guava The Behat Coconut guava, as its name suggests, has a sweet coconut-like flavor and aroma. This variety has light green to yellow skin when ripe and soft white flesh inside. Behat Coconut guava is believed to have originated in Asia and is now grown in tropical regions for its unique coconut essence. 10.Hong Kong Pink Guava Hong Kong Pink guava has deep pink outer skin surrounding sweet, white flesh speckled with red. It is packed with flavor, low in seeds, and contains high vitamin C content. This variety thrives in subtropical climates, prized by growers in southern China and Taiwan. World production of guava Country Annual Production (Metric Tons) Primary

Scroll to Top